
Want to Relocate a Tree? Here Are 9 Steps Through Which You Can Safely Move One
One needs to keep in mind that the process requires complete commitment on the planters’ behalf, for any kind of lapse could result in failure and loss of a tree.
The development of an urban region is invariably connected with the boom of real estate and infrastructure projects.
However, this comes at the cost of our trees, which face the axe on an exponential basis to give way for various development projects.
One expansive project results in thousands of trees being felled. But what we do not realise is the fact that a fully matured tree once gone is gone forever and any sapling planted in its place would take a very long time even to spread its branches.
While it takes a lot more than desktop activism and campaigning to stop the concerned authorities from axing the trees, what can be done instead is to transplant them.

In fact, the concept is being practised across the world and has been picked up by various civic bodies in the country as well.
Although municipal authorities have been implementing the transplantation through mechanised support and massive machinery, the process can actually be undertaken by a group of individuals as well.
However, one needs to keep in mind that the process requires complete commitment on the planters’ behalf, for any kind of lapse could result in failure and loss of a tree.
Here are nine steps that will help you understand what exactly goes behind the process of a tree transplantation:
1. Identify the location where you intend to move the tree. The location should ideally be selected, keeping in mind the amount of space and sunlight meeting the tree’s requirements. Also, your knowledge about the species plays a significant role for the tree to adapt in the new site.
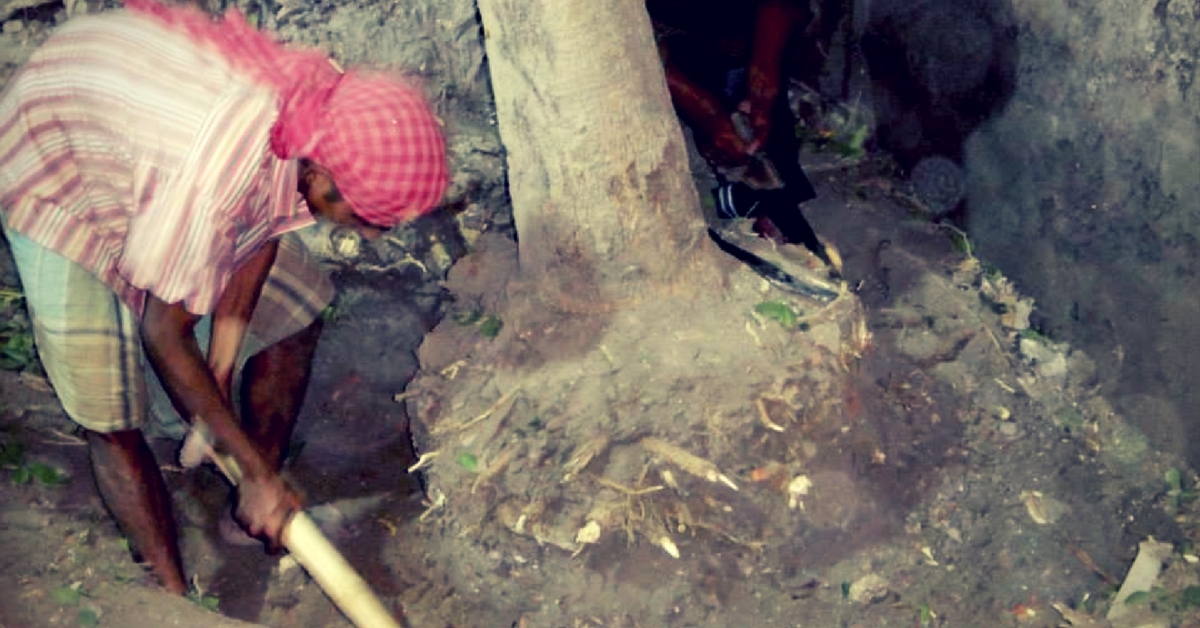
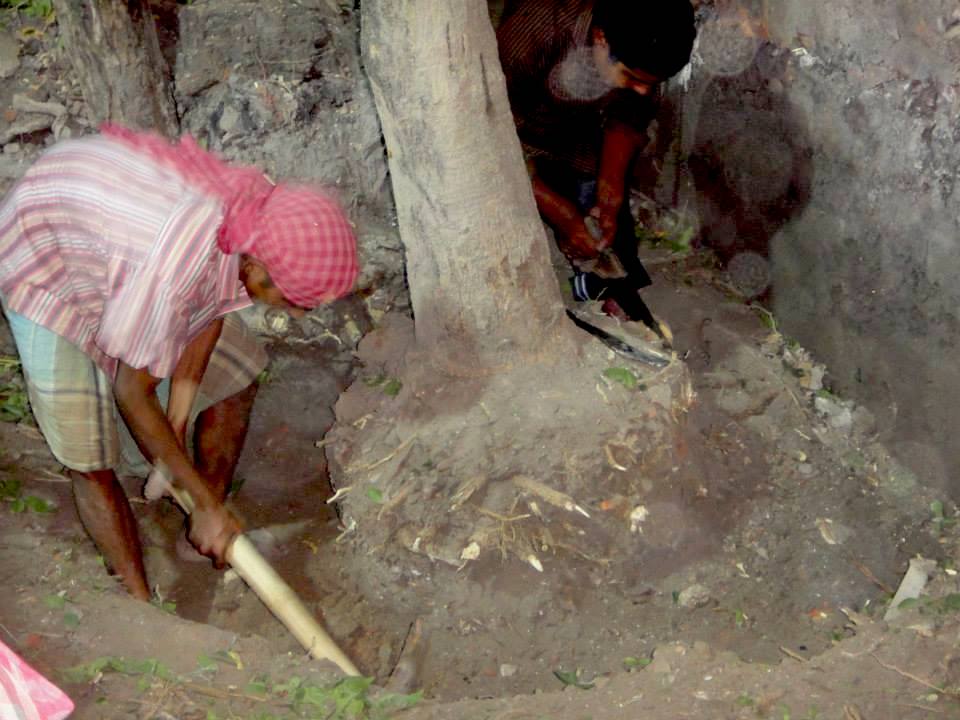
2. You can begin by moistening the soil around the tree thoroughly about three to four days before the move with the help of a hose or watering. Following which, the tree’s roots have to be identified. It is important to keep in mind that you retain as much of the root system in place as possible.
3. The digging has to be carried out carefully. You can use a sharp spade to dig a trench around the tree’s base. The trench has to be approximately 1.5 to 2 feet deep. While digging the tree out, you need to leave the roots and the surrounding clump of soil intact, which together is known as ‘root ball’.
4. Ideally, the width of the trench should be double the width of the root ball. Next, pull the tree out of the hole and shape the bottom of the root ball using the spade like a ball. If the need arises, you can cut some of the roots beneath.
5. By tipping the tree and root ball to one side, tightly wrap the root ball with a piece of burlap that can cover the clump entirely. The burlap piece has to be secured to the tree trunk with thick cord. Please take special care to do all of this gently and try not to displace any of the dirt while tipping the root ball onto the burlap.
6. The tree is now ready to be carried to the transplant spot and must be particularly lifted and carried by the root ball. Pay heed that the new trench is at least two to three times the size of the root ball, while the depth remains approximately an inch lesser than the root ball’s length such that the burlap is visible even after placement of the tree in the trench.
7. Lower the tree gently into the hole in the same position that it originally grew in and place the trunk and branches in the upright direction. You can now begin filling the hole with the unearthed soil with the help of the spade and use your hands while packing the dirt around the root ball. This will help support and stabilise the tree at the new location.
8. Cut the cord securing the burlap with the help of scissors once two-thirds of the hole is refilled with mud. At this point, shear away any visible remains of the burlap in the hole. Continue filling the remainder of the hole with the unearthed soil and finish by creating a slight mound around the trunk base. Make sure that you water the newly planted tree thoroughly.
9. Next couple of weeks are crucial, and you will have to keep monitoring the tree closely at least for a month or so. Don’t forget to water the tree every 10 to 14 days, in case it has not rained in the meantime.
Like this story? Or have something to share?
Write to us: [email protected]
Connect with us on Facebook and Twitter.
NEW: Click here to get positive news on WhatsApp!
If you found our stories insightful, informative, or even just enjoyable, we invite you to consider making a voluntary payment to support the work we do at The Better India. Your contribution helps us continue producing quality content that educates, inspires, and drives positive change.
Choose one of the payment options below for your contribution-
By paying for the stories you value, you directly contribute to sustaining our efforts focused on making a difference in the world. Together, let’s ensure that impactful stories continue to be told and shared, enriching lives and communities alike.
Thank you for your support. Here are some frequently asked questions you might find helpful to know why you are contributing?


This story made me
-
 97
97 -
 121
121 -
 89
89 -
 167
167


